|
Translation hier
New
Let's begin . 1. File-New-New Image: 995 x 555 pixels black !!!!!! 2. Effects -Plugins Dragonfly – Sinedots II:with these settings /color: #c00000
3. Adjust-Blur-Radial Blur with these settings
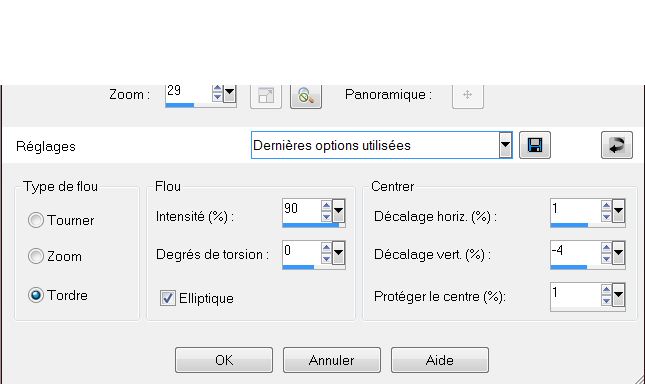
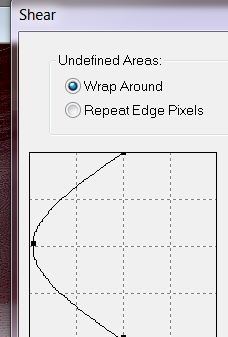
4. Layers - New Raster Layer 5. Selections- Select All 6. Open the tube ''aliens '' Edit/copy-Edit paste into selection 7. Adjust-Blur-Radial Blur -the same settings but check >>Zoom 8.Effects - Plugins - Distort -Shear with these settings
- Repait: Effects - Plugins - Distort -Shear 9. Effects - Edge Effects- Enhance More 10. Effects - Reflection Effects- Rotating Mirror: all in 0 and check :Reflect - Layer-Palette: Change the Blend Mode to :"Hard Light" 11. Open the tube ''renee-zone rouge image1'' Edit/copy -Edit/paste as a new layer and place. Lower the opacity down to 89% 12. Open the tube ''zone rouge-cage '' Edit/copy -Edit/paste as a new layer and place.
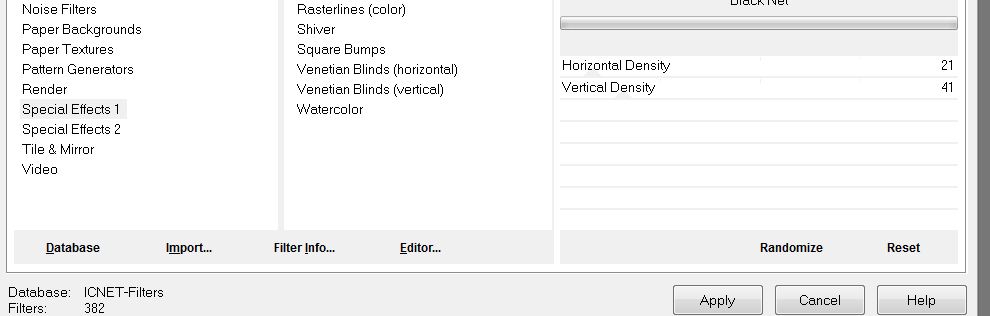
13. Open the tube ''NS_129_0909''- Image Mirror. Edit/copy -Edit/paste as a new layer and on the left side - Layer-Palette: Change the Blend Mode to :"Hard Light" - Aktivate the top of the Layers palette 14. Layers - New Raster Layer 15. Selections - load/save selection- load selection from disk and select my file ''zone rouge -selec 1 '' - Flood Fill Tool: Fill the selection with color: #da1216 16. Effects -Plugins ICNET Filters -Special effect 1- Black net with these settings
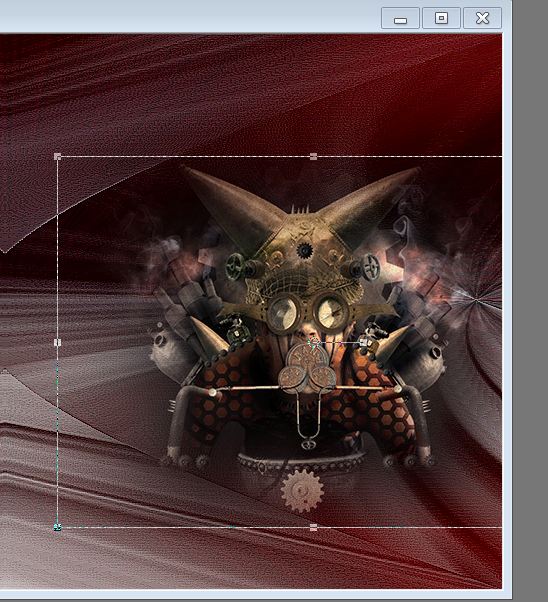
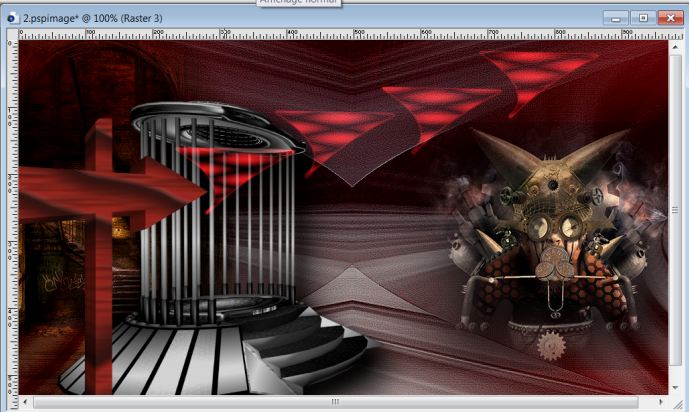
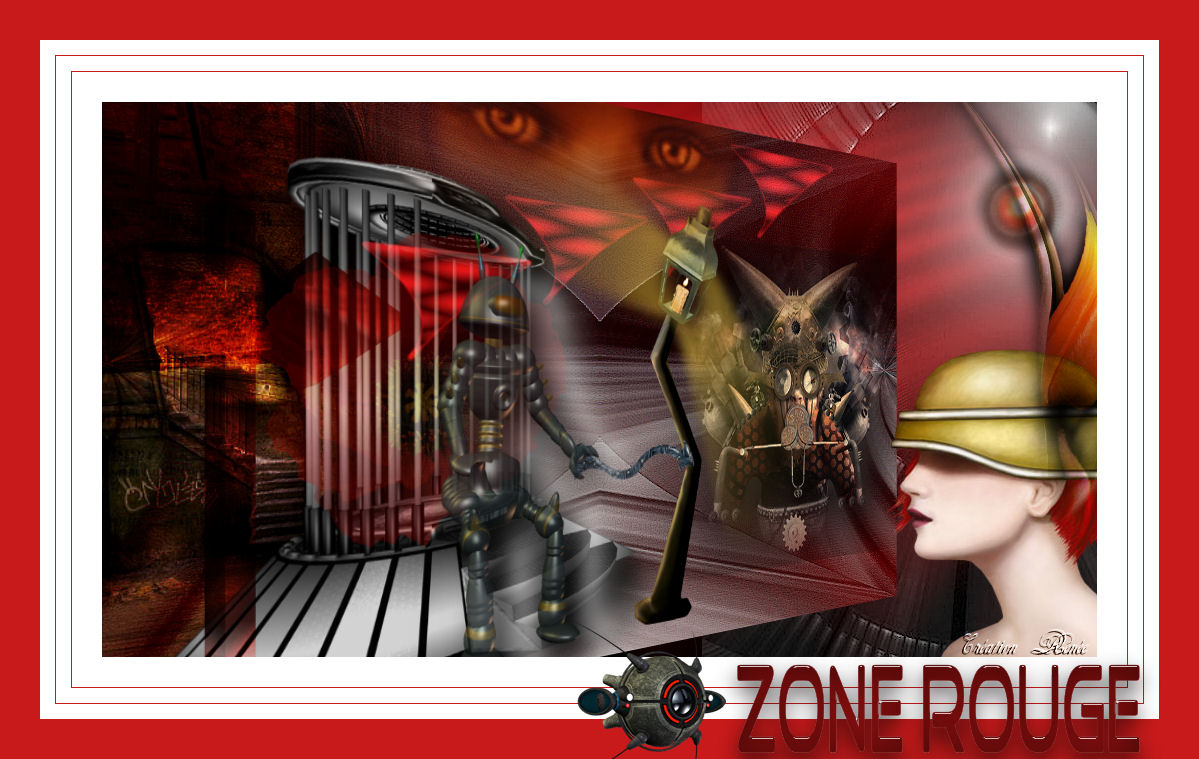
17. Selections - Deselect all 18. Layer-Palette: Change the Blend Mode to :"Screen" Your work look like this now
19. Open the image ''travelling-element 35 '' on this picture: - Effects -Plugins Eye Candy5 -texture and choose my preset ''renee-zone rouge -texture-wood'' - Effects-Plugins Eye Candy 5 Impact -extrude and choose my preset -''renee-zone rouge-extrude'' 20. Edit/copy-Edit paste as a new layer and place - (changed image )
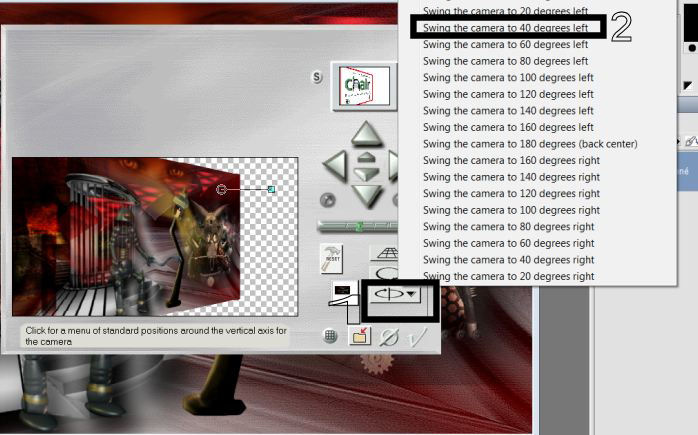
21. Layer-Palette: Change the Blend Mode to :"Overlay" 22. Open the tube ''coquelicot "Edit/copy-Edit paste as a new layer and place inside the cage 23. Layer-Palette: Change the Blend Mode to :"Hard Light" Lower the opacity down to 26% (to create a red space) 24. Open the tube ''zone rouge réverbère'' Edit/copy-Edit paste as a new layer and place 25. Open the tube ''zone rouge robot ''Image Resize 65% -all layers unchecked/ Edit/copy-Edit paste as a new layer and place Lower the opacity down to 77% 26. Effects -Plugins Eyecandy 5 Impact - perspective shadow-and choose my preset ''renee-eyecandy-perspec2'' 27. Open the tube ''zone rouge flèche -Edit/copy-Edit paste as a new layer 28. Layers-Arrange-Move Down / ( well placed in the hand of the robot) 29. Open the tube ''zone rouge-yeux'' -Edit/copy-Edit paste as a new layer and place 30. Layers-Merge-Merge Visible 31. Effects -Plugins Andromeda perspective clic >1 et ensuite choisir =(2) Swing the camera to 40 degrees left
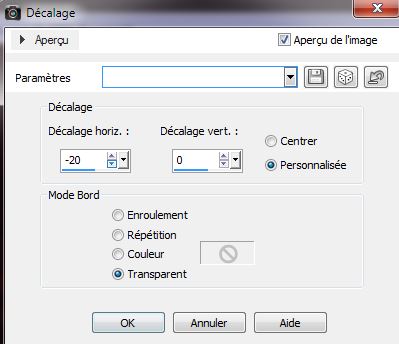
Effects - Image Effects-Offset with these settings
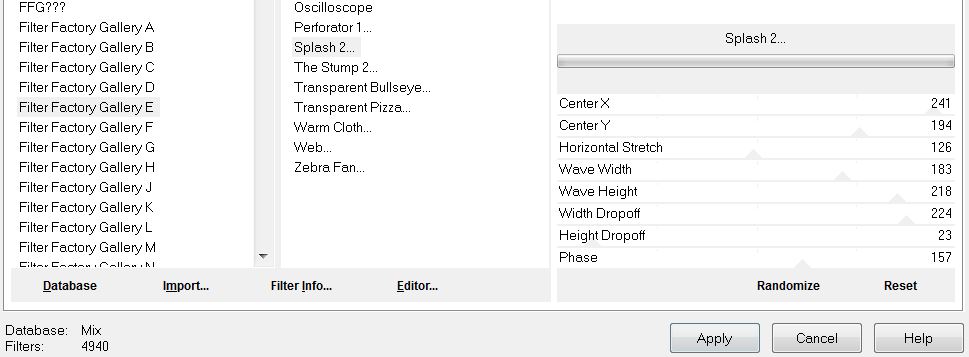
32. Layers - New Raster Layer - Material- Properties : FG-Color #db171a .BG-Color black .Prepare a linear gradient as below: 0/0 invert checked. Flood Fill Tool: fill the layer with the gradient - Layers-Arrange-Move Down 33. Effects -Plugins Unlimited -Factory Gallery E – Splash 2(filter in the file)
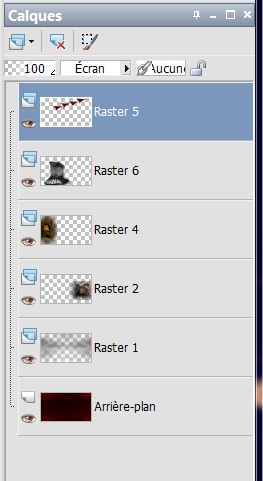
34. Effects -Edge Effects- Enhance More 35. Effects-Plugins Unlimited Photo AginKit – Centerpost-Vignetting 255 36. Layers - New Raster Layer 37. Selections - load/save selection- load selection from disk and select my file ''zone rouge selec 2 '' Flood Fill Tool: fill the selection with color white 38. Selections - Deselect all 39. Effects - Edge Effects- Enhance 40. Open the tube ''Gerry-faces44-5 mei 2008 . Edit/copy-Edit paste as a new layer and place 41. Open the tube ''zone rouge image 2'' Edit/copy-Edit paste as a new layer and place 42. Open the tube ''zone rouge image 3'' Edit/copy-Edit paste as a new layer and place - Layer-Palette: Change the Blend Mode to :"Multiply" 43. Layers-Duplicate - Layers-Arrange-Move Down Layer Palette look like this now
44. Layers-Merge-Merge Visible 45. Image - Add Borders - Symmetric checked:30 pixels white 46. Image - Add Borders - Symmetric checked:1 pixels color: #c81a1a 47. Image - Add Borders - Symmetric checked:15 pixels white 48. Image - Add Borders - Symmetric checked:1 pixels color: #c81a1a 49. Image - Add Borders - Symmetric checked:15pixels white 50. Image - Add Borders - Symmetric checked:40 color #c81a1a 51.Open the text and place .Or write your own text I hope you enjoyed this lesson Renée This lesson was written by Renée Created the 22//09/2012 *
Any resemblance with an existing lesson is merely a coincidence. * Don't forget to thank the people who work for us and with us. I named the tubeurs - Testers and the translators. Thanks Renée.
I am part of Tutorial Writers Inc. My tutorials are regularly recorded
*
|
 Translations