|
Translations here
Epopée Instable
New
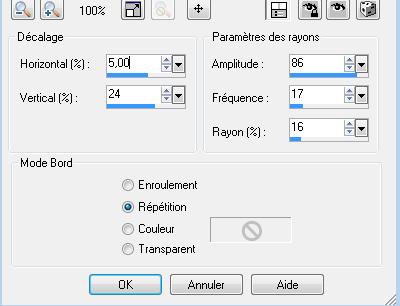
Let's start the lesson. 1. Open a transparent image of900 x 580 pixels 2. Activate Flood Fill Tool and fill the layer with color black 3. Open the tube '' renée-epopee-instable'' -Edit/ Copy-Edit - Paste as new layer on your working area 4. Effects- Distortion Effects-Spiky Halo with these settings
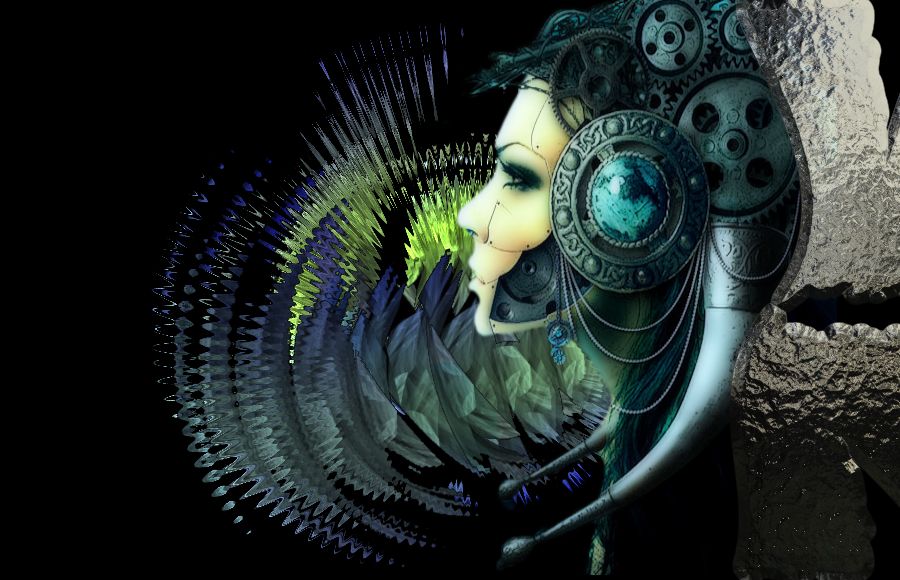
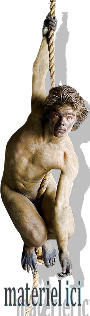
- Double click on this layer and set the Blendmode to Screen 5. Open the tube ''renee-epopee-instable-metal'' -Edit/ Copy-Edit - Paste as new layer on your working area and move to the right side - Set the layer opacity of this layer to 83% 6. Open the tube ''Jenneke-Tube'' /Image Mirror 7. Edit/ Copy-Edit - Paste as new layer on your working area /Layers- Arrange- Move Down - Move Tool: Put the tube in it's place as shown in the example below
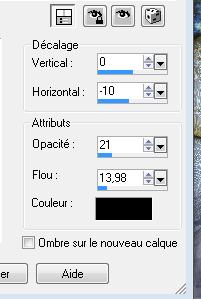
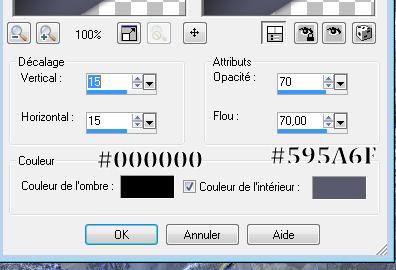
8. Open the tube ''renee-epopee-instable-barre'' -Edit/ Copy-Edit - Paste as new layer on your working area 9. Effects- Image Effects- Offset with these settings: H – 275 and V 0 - Activate the top of the layer-Palette 10. Open the tube ''renee-epopee-instable-cercle'' -Edit/ Copy-Edit - Paste as new layer on your working area 11. Layers- Merge- Merge- Visible 12. Layers- Duplicate 13. Image Resize with 60% (Resize all the layers not checked) 14. Effects- Plugins- Eyecandy5impact
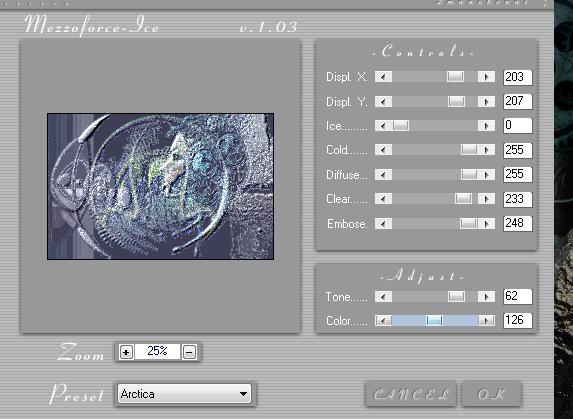
/ Glass- - Activate the bottom of the layer-palette 15. Effects- Plugins- Mezzo force Ice e.1.03 with these settings
16. Open the tube ''triangle1'' -Edit/ Copy-Edit - Paste as new layer on your working area /Double click on this layer and set the Blendmode to Multiply 17. Effects-3 D Effects- Drop Shadow with these settings-
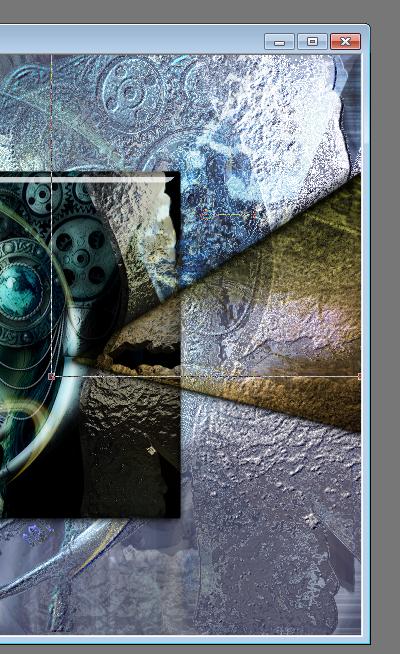
18. Open the tube ''triangle 2'' /Edit/ Copy-Edit - Paste as new layer on your working area/Double click on this layer and set the Blendmode to Overlay /Set the layer opacity of this layer to 75% - Move Tool: Put the tube in it's place as shown in the example below
19. Stay on this layer 20. Effects- 3D Effects-Cutout with these settings
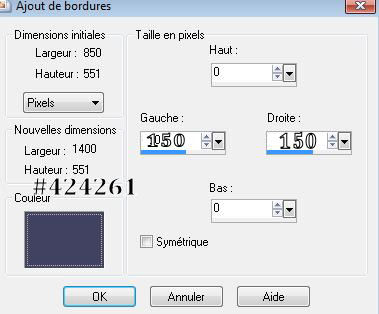
21. Open the tube ''triangle 3'' -Edit/ Copy-Edit - Paste as new layer on your working area and move to the left side 22. Open the tube "renee-barre28'' -Edit/ Copy-Edit - Paste as new layer on your working area and move to the left 23. Open the tube ''angeldesign-autre3'' / Image Resize with 35% Edit/ Copy-Edit - Paste as new layer on your working area and move 24. Open the tube ''claudiavizza-hombre-72'' two 2 tubes /Image Resize with 60% -Edit/ Copy-Edit - Paste as new layer on your working area and move 25. Layers- Merge- Merge Visible 26. Image - Add borders-Symmetric checked: 5 pixels black 27. Image Resize with 850 pixels Width 28. Image - Add borders-Non Symmetric with these settings
29. Promote Background Layer 30. Open the tube ''gina tubes Femmes 1406''/Image Resize with 90% -Edit/ Copy-Edit - Paste as new layer on your working area and move 31. Open the tube ''renee-epopee-instable-rideau'' -Edit/ Copy-Edit - Paste as new layer on your workingarea and move to the left 32. Open the tube ''renee-epopee-instable-tache'' -Edit/ Copy-Edit - Paste as new layer on your working area Layers- Arrange- Move Down (under the rideau layer ) - Double click on this layer and set the Blendmode to Dissolve / Set the layer opacity of this layer to 91% 33. Image - Add borders-Symmetric checked: 2 pixels #424261 34. Image - Add borders-Symmetric checked: 25 pixels color white 35. Layers- Merge- Merge All. Save as JPG
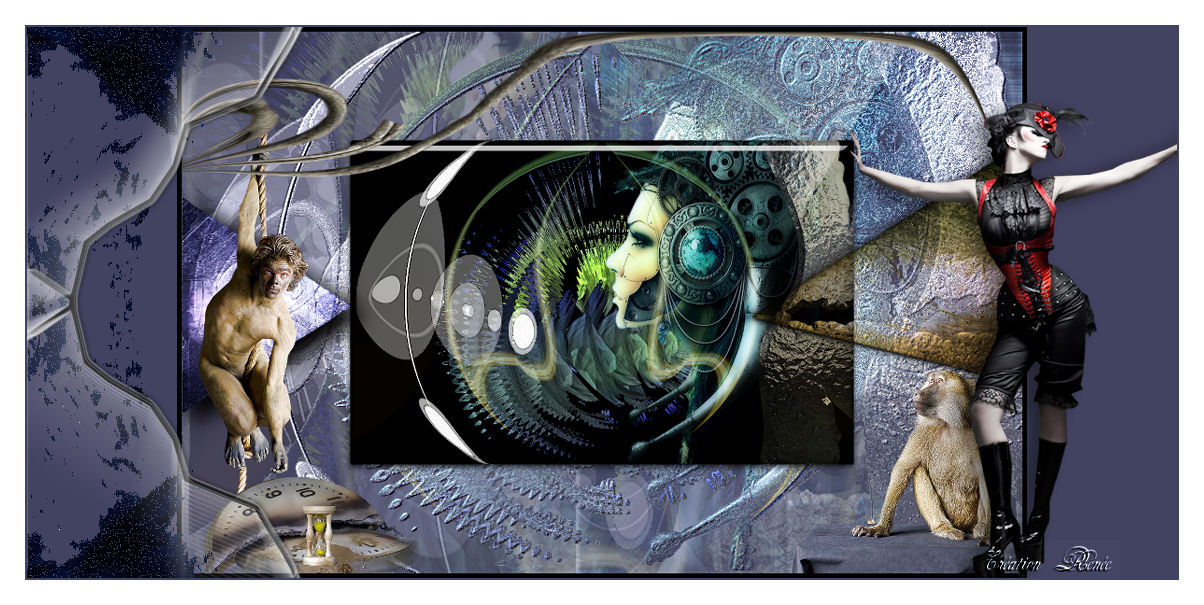
I hope you enjoyed this lesson Renée This lesson was written by Renée 2010 Placing 9/2010 Any resemblance with an existing lesson is merely a coincidence * * Don't forget to thank the people who work for us and with us. I named the tubeurs - Testers and the translators. Thanks Renée. * 2014 reçu de TWInc I am part of Tutorial Writers Inc. My tutorials are regularly recorded ReneeGraphisme_All rights reserved
*
|
 Translations